
自分のPCに Open-Interpreter を導入して利用する方法を紹介します。
Pythonの導入
動作環境に、Python を必要としますので、以下の URL からサイトへ接続し、導入すると簡単です。
Microsoft Store などからもインストールは可能ですが、バージョンの指定などができないので、個別に対応できるバージョンのPythonを取得し、インストールする事をお勧めします。
インストーラーを取得
open-interpreter は Python 3.11.x に対応していますので、対象バージョンの最新を取得します。
- サイトにアクセス – https://www.python.org
- ページ上部の Download をクリック
- スクロールし、 Looking for a specific release? から Python 3.11.6 の Download をクリックするとページが変わります
- スクロールし、 Files から Windows installer (64-bit) をクリック
- インストーラーがダウンロードされます。
2023.12.14 現在 – python-3.11.6-amd64.exe がダウンロードされると思います。32-bit や、ARM64 を必要とするケースは社内ではないと思っています。
インストール実施
ダンロードしたインストーラーを実行しますが、注意点がありますので、確認しながら操作してください。
- python-3.11.6-amd64.exeをダブルクリック
- Install Python 3.11.6 の画面が表示されます。
- 画面下の Uer admin privileges when installing py.exe をチェック
- Add python.exe to PATH をチェック
- Customize installation をクリック
※Install Now で良いのですが、その場合共有PCでは個別にインストールが必要となります。 - Optional Features の設定
- すべてのチェックを有効にします (既定値で有効になっていると思います)
- Next をクリック
Advanced Options の画面で、設定を変更します。
- Install Python 3.11 for all users にチェック
- このチェックを有効にする事で、 Customize install location が C:\Program Files\Python311 に変わります。
PATH が短くなるので、お勧めです。 - Download debugging symbols と、 Download debug binaries のチェックは不要です。
- Install をクリック
UAC(このアプリがデバイスに変更を加えることを許可しますか?) が表示されますので、許可してください。
Setup was successful が表示されれば完了ですが、おまけの作業としてDisable path length limit をクリックします。それほど重要ではないのですが、 Python を利用していると、環境変数の長さが足りないケースが発生する可能性がありますので、その対応を行うものです。
クリックすると、なにかしら実行され、画面が戻りますので、 CLOSE を押してください。
以上で Python のインストールは完了です。
Python の作業場所を用意
※資料ではバックスラッシュで表示されてしまいますが、画面上では `¥` で表示されます。
作業用のフォルダを C:\work に用意する事にします。エクスプローラーなどで、 C: ドライブの直下に WORK フォルダを作成してください。
ターミナルなどで、以下のように実行しても同様です。
mkdir c:\work
Python の仮想環境
Python の仮想環境を作成する事で、 Python の動作がおかしくなったばあいに、簡単にやり直しができるようになります。以下のように実行してください。
コマンドプロンプトや、ターミナルを使って作業します。
cd c:\work
python -m venv oi
少し時間がかかるかもしれませんが、Python の仮想実行環境が作成されます。

仮想環境の動作確認
入力に戻りますので、仮想環境を実行してみます。
.\oi\Scripts\activate
実行後、以下の例のように、行頭に (oi) が表示されれば、仮想環境に入り、利用できる状態となります。
(oi) C:\work>
もし、PowerShell 環境で実行している場合には、権限がないためにエラーとなってしまう可能性があり、その場合は、次のように表示されます。
.\oi\Scripts\activate : このシステムではスクリプトの実行が無効になっているため、ファイル C:\work\oi\Scripts\Activate.ps
1 を読み込むことができません。……
+ .\oi\Scripts\activate
+ ~~~~~~~~~~~~~~~~~~~~~
+ CategoryInfo : セキュリティ エラー: (: ) []、PSSecurityException
+ FullyQualifiedErrorId : UnauthorizedAccess
その場合には、以下のコマンドを実行してください。
Set-ExecutionPolicy -ExecutionPolicy RemoteSigned -Scope CurrentUser
以下のように表示されればか完了です。
(oi) PS C:\work>
仮想環境から抜ける
仮想環境を抜けるには、以下のコマンドを実行してください。
deactivate
正式な抜け方ではありますが、ターミナルを閉じれば終了しますので、それほど気にしなくても良いと思っています。
Open-Interpreter の導入
Python の仮想環境で pip install open-interpreter を実行します。
以下は、プロンプトを含めて例示しています。
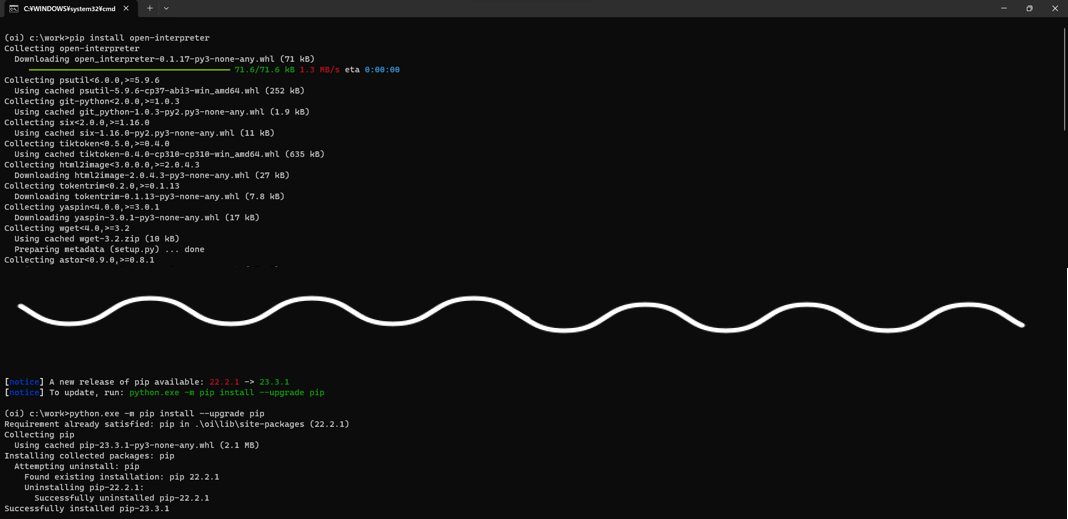
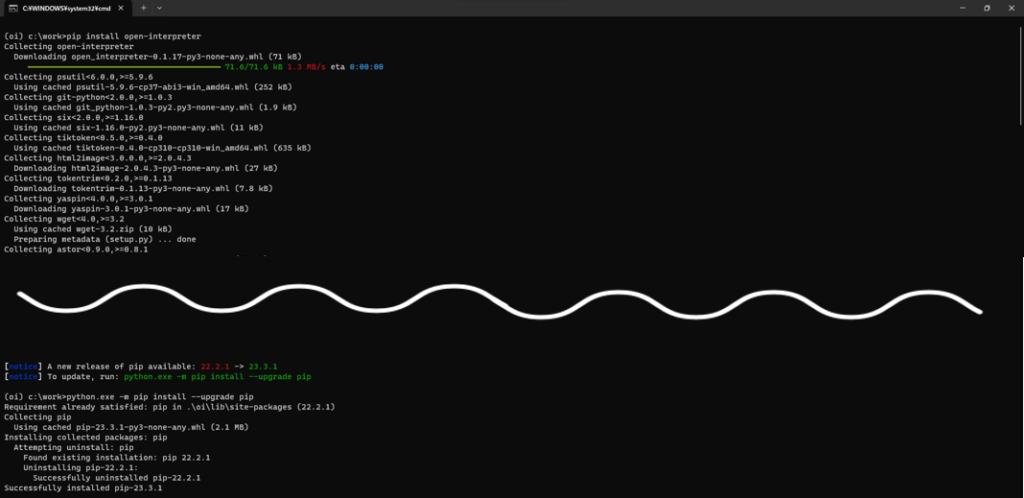
(oi) PS C:\work> pip install open-interpreter
インストールの完了時に、以下が表示された場合には、指示通り python.exe -m pip install –upgrade pip を実行してください。
[notice] A new release of pip is available: 23.2.1 -> 23.3.1
[notice] To update, run: python.exe -m pip install –upgrade pip
Python の仮想環境を導入の際に、
Python の仮想環境を作成する事で、 Python の動作がおかしくなったばあいに、簡単にやり直しができるようになります。
と書きましたが、open-interpreter は、自動的に様々プログラムの導入も行います。場合によっては、動作しなくなるケースも考えられますので、その場合には、
C:\work\oi
を削除し、仮想環境を作り直す事ができます。
Open-Interpreter を利用する
Open-interpreter を実行するには、
- ターミナルまたは、コマンドプロンプトを開く
- フォルダを移動する
cd C:\work
- Activate を実行する
.\oi\Scripts\activate
- 起動する
interpreter
起動の速度は環境依存です。
デフォルトでは、起動すると Openai の API KEY を求められます。
OpenAI API key:

次回から省略したい場合などは、説明にありますが、以下のように指定します。 your_api_key が、API KEY です。
setx OPENAI_API_KEY your_api_key
設定したら、ターミナルを閉じて再実行してください。
なお、終了する場合には、 CTRL + C を押します。
Press CTRL-C to exit.
利用例 – 実行オプションの表示
オプション -h または –help を指定すると、次のように表示されます。
usage: interpreter [-h] [-s SYSTEM_MESSAGE] [-l] [-y] [-d] [-dp] [-m MODEL] [-t TEMPERATURE] [-c CONTEXT_WINDOW]
[-x MAX_TOKENS] [-xo MAX_OUTPUT] [-b MAX_BUDGET] [-ab API_BASE] [-ak API_KEY]
[-safe {off,ask,auto}] [-cf CONFIG_FILE] [-v] [–config] [–conversations] [-f] [–version]
Open Interpreter
options:
-h, –help show this help message and exit
-s SYSTEM_MESSAGE, –system_message SYSTEM_MESSAGE
prompt / custom instructions for the language model
-l, –local experimentally run the language model locally (via LM Studio)
-y, –auto_run automatically run generated code
-d, –debug_mode run in debug mode
-dp, –disable_procedures
disables procedures (RAG of some common OI use-cases). disable to shrink system message. auto-
disabled for non-OpenAI models
-m MODEL, –model MODEL
language model to use
-t TEMPERATURE, –temperature TEMPERATURE
optional temperature setting for the language model
-c CONTEXT_WINDOW, –context_window CONTEXT_WINDOW
optional context window size for the language model
-x MAX_TOKENS, –max_tokens MAX_TOKENS
optional maximum number of tokens for the language model
-xo MAX_OUTPUT, –max_output MAX_OUTPUT
optional maximum number of characters for code outputs
-b MAX_BUDGET, –max_budget MAX_BUDGET
optionally set the max budget (in USD) for your llm calls
-ab API_BASE, –api_base API_BASE
optionally set the API base URL for your llm calls (this will override environment variables)
-ak API_KEY, –api_key API_KEY
optionally set the API key for your llm calls (this will override environment variables)
-safe {off,ask,auto}, –safe_mode {off,ask,auto}
optionally enable safety mechanisms like code scanning; valid options are off, ask, and auto
-cf CONFIG_FILE, –config_file CONFIG_FILE
optionally set a custom config file to use
-v, –vision experimentally use vision for supported languages (HTML)
–config open config.yaml file in text editor
–conversations list conversations to resume
-f, –fast run `interpreter –model gpt-3.5-turbo`
–version get Open Interpreter’s version number
利用例 – 即実行
起動時に、以下のように指定すると、プログラムが応答確認無く実行されるようになります。
interpreter -y
利用例 – モデルの変更
-f もしくは、 –fast オプションを指定すると gpt-3.5-turbo を利用して動作します。
–config オプション
config.yaml の編集を行います。
性格付けを行うためのファイルです。利用する model を指定する事もできます。
% で始まるコマンド
特殊な指定方法として、 % から始まるコマンドが用意されています。%help と入力する事で、以下を表示できます。
▌ Available Commands:
• %% [commands]: Run commands in system shell
• %debug [true/false]: Toggle debug mode. Without arguments or with ‘true’, it enters debug mode. With ‘false’, it
exits debug mode.
• %reset: Resets the current session.
• %undo: Remove previous messages and its response from the message history.
• %save_message [path]: Saves messages to a specified JSON path. If no path is provided, it defaults to
‘messages.json’.
• %load_message [path]: Loads messages from a specified JSON path. If no path is provided, it defaults to
‘messages.json’.
• %tokens [prompt]: EXPERIMENTAL: Calculate the tokens used by the next request based on the current conversation’s
messages and estimate the cost of that request; optionally provide a prompt to also calulate the tokens used by that
prompt and the total amount of tokens that will be sent with the next request
• %help: Show this help message.
• %info: Show system and interpreter information